
Lets take a look at some of the iLogic basics by programming a form into a part.
What is iLogic
iLogic is a system that allows you to incorporate programming logic into your designs. Built upon Visual Basic (VB) it comes pre-loaded with Inventors API along with a simplified Instruction set.
The basics
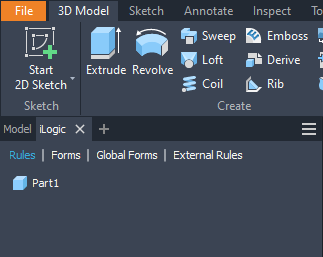
iLogic can be located sidebar; if the tab isn’t already visible, simply click the plus icon next to ‘Model’ and select ‘iLogic.’
Rules serve as a way to introduce logic to parts, assemblies, and drawings. This is the space for any programming intended exclusively for that specific file.
Forms offer a convenient method for crafting custom interfaces, enhancing the user experience. Instead of navigating into properties or parameters, users can seamlessly interact with a singular form.
For rules or forms intended to span multiple files, opting for global variants is the most effective approach.
Rule0
To use iLogic we first need a subject, create a cube with the parameters: Height, Width, and Depth. In the Parameters editor also add a True/False parameter called Square.
Note: When adding dimensions you can assign both a name and value at the same time, instead of just the value put name = value i.e. Height = 10
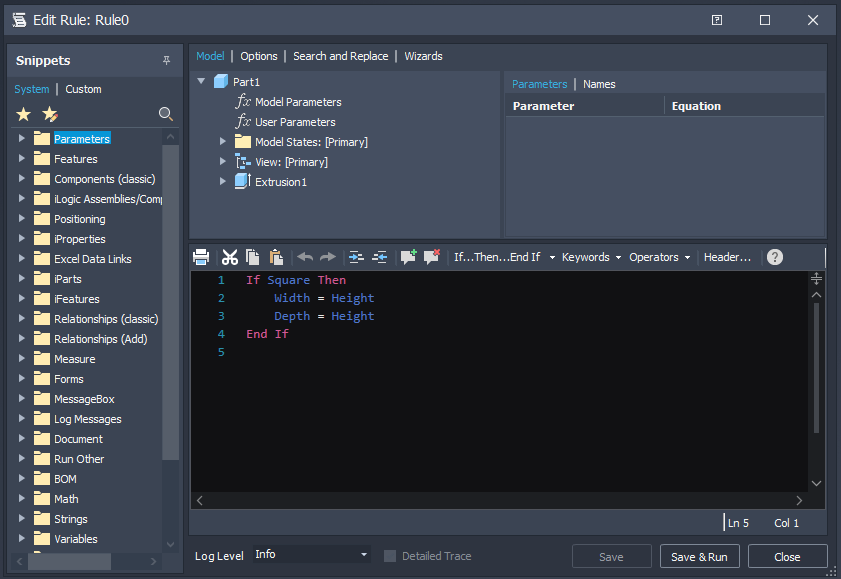
Once the part is done it’s time to create a rule, in the ‘Rules’ tab wright click and add a new rule. Once you give it a name you will see the rule editor.
Now just add some code, paste the following into the text box and hit ‘Save & Run.’
If Square Then
	Width = Height
	Depth = Height
End If
So what does this do?
Colours play a crucial role here. In white, we have our variables, or parameters as they are known in Inventor. In red, we find the keywords, acting as instructions to the computer.
First up is ‘If,’ which declares that anything between it and ‘Then’ should result in a value of ‘True’ or ‘False.’ The parameter ‘Square,’ if set correctly, will always contain one of these two values. If ‘Square’ is set to ‘True,’ then the indented section of code will run, setting the values of ‘Width’ and ‘Depth’ to that of ‘Height.’ If ‘False,’ then the three values will all be independent. ‘End If’ must always come after an ‘If’, this just declares that we are done with the if statement.
Take some time to experiment with changing the parameters, and you’ll notice that the rule auto-runs every time something changes. While this is suitable for a simple rule and part, it might not be desired for more complex parts. To prevent the rule from auto-running, simply right-click on it and suppress it. Even in the suppressed state, you can still manually run the rule using a form or by right-clicking and selecting ‘Run Rule.’
Form 1
The parameter editor isn’t very user-friendly, so let’s create a form. Just as when creating a rule, switch over to the Forms tab and right-click to create a new form.
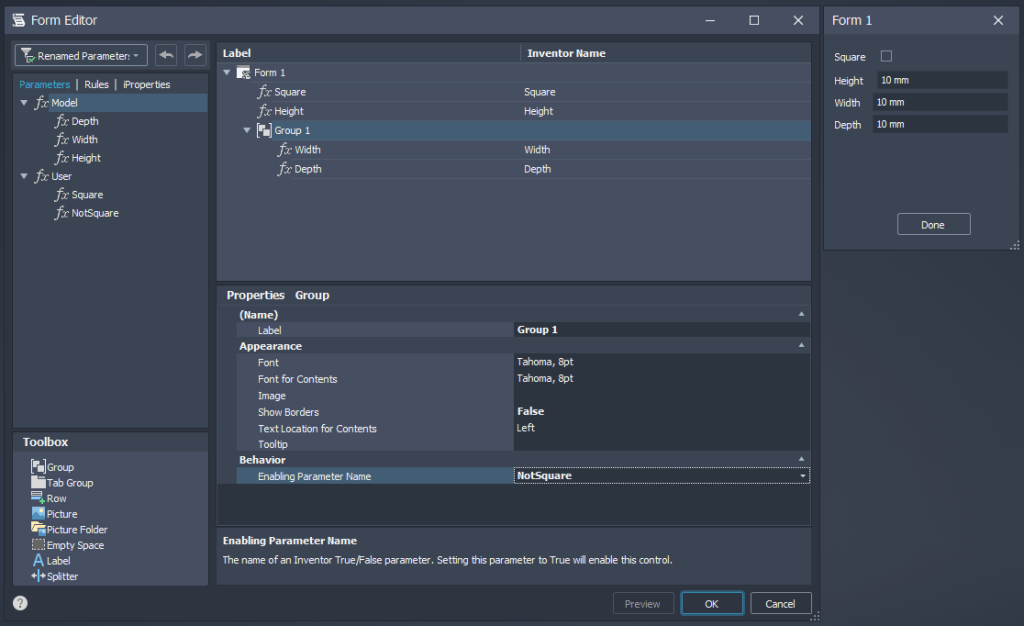
Now, you should see the editor alongside a preview of the form on the right. To add parameters to the form, simply drag them from the sidebar into the main window.
When ‘Square’ is set to ‘True,’ we don’t want users to edit ‘Width’ or ‘Depth’ as these values will just be overwritten by the rule. To disable the boxes, create a group and place the parameters within it. If you prefer the group without borders, select the group and set the ‘Show Borders’ property to ‘False’ in the properties below.
Next, we need to toggle the group on and off. To achieve this, add a ‘True/False’ parameter to the ‘Enabling Parameter Name’ property. ‘Square,’ has the inverted behaviour from what we want. To correct this, create a new parameter called ‘NotSquare,’ also ‘True/False,’ and add the following line to your rule:
NotSquare = Not SquareNow, add ‘NotSquare’ to the properties of the group. Click ‘OK’ in the editor, and open up the form. You should find that when ‘Square’ is ticked, you cannot edit ‘Width’ or ‘Depth.
Some things to note
In VB, ‘Not’ is a keyword that inversely evaluates a Boolean expression, essentially converting ‘True’ to ‘False’ and vice versa. Therefore, line 6 states that we want ‘NotSquare’ to be the opposite of ‘Square.’
You might wonder why use ‘Square’ at all when we could just use ‘NotSquare.’ Programming offers various approaches to reach the same goal, and this method aims to enhance the clarity of the if statement and the form. However, it comes with a drawback—suppressing ‘Rule0’ will render the form non-functional. A workaround for this issue is to move line 6 to a new rule that remains unsuppressed at all times.
iLogic always takes precedence in execution, meaning that any equations in the Parameters section will not receive updates until all the rules are complete. It is advisable to concentrate equations in only one of the two sections to avoid complications arising from outdated variables causing issues.
Variables and parameters must always be a single word and unique. The computer is indifferent to the names you assign, but opting for logical and descriptive names can significantly aid you or anyone else editing them in the future. If you prefer more descriptive variable names, you can use multiple words joined together, best achieved through camelCase. In camelCase, the first letter of each word is capitalized, as shown with ‘NotSquare.’
If you whish to learn more about statements that can be used in iLogic then I would recommend heading to Microsoft Learn. The most important for beginners will be the ‘If’ and ‘Select…Case’, the ‘For’ or ‘Do’ loops will often be useful for more advanced programs.